Neptune — The Dark Spot and the Geysers
4.35 billion kilometres out, at the edge of the solar system. This may be the most unfair stretch in the game: your tower is attacked from above and below.
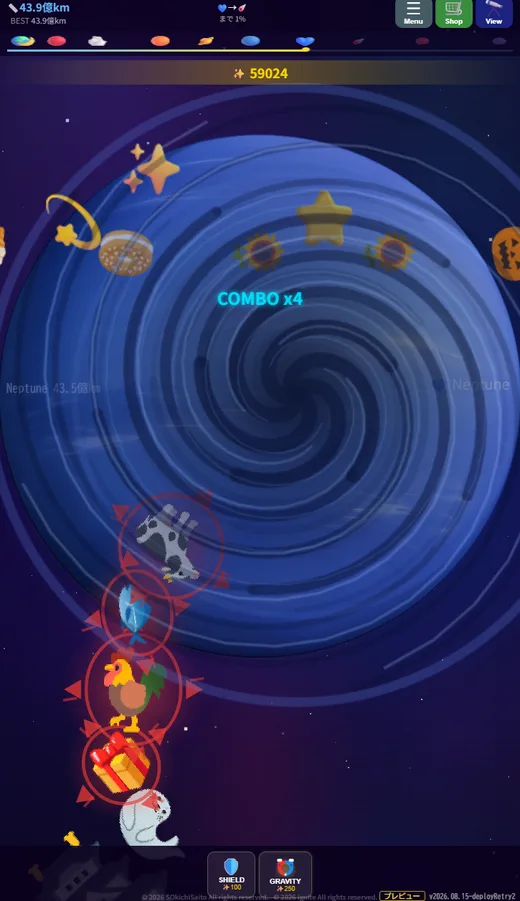
Two independent hazards
Neptune has two hazards running on separate timers. They can overlap.
| Hazard | Cycle | First trigger |
|---|---|---|
| Great Dark Spot | Grow 1 s → Peak 6 s → Fade 1.5 s → Rest 8±1 s (7–9 s) | 1.5 s after entry |
| Geyser | Omen 1.2 s → Blast 0.7 s → Rest 9±1.5 s (7.5–10.5 s) | 2 s after entry |
Understanding that both hazards follow their own rhythms — rather than being triggered together — lets you plan around each one independently.
Hazard one: the Great Dark Spot
A vast vortex appears on screen. Anything caught inside its radius gets spun.
What makes it nasty is that it does not simply pull — it rotates your items. As they turn, the surfaces that were interlocking slip out of alignment and the structure itself comes apart.
The vortex follows a fixed cycle:
- Growth (~1 s) — the vortex forms and pulls strengthen
- Peak (~6 s) — maximum force. This is the crisis point
- Fade (~1.5 s) — it weakens
- Rest (8±1 s, 7–9 s) — close to ten seconds of quiet. Rebuild here
In other words, it always ends if you endure it. Do nothing at the peak, do everything in the rest phase — the same rhythm this game has been teaching since Mars.
The vortex spawns within ±80 px of the screen's horizontal centre, about 30% down from the top edge. Its pull radius is 220 px — items closer to the centre feel it more strongly.
Hazard two: geysers
Meanwhile, geysers erupt from below within a certain altitude band, punching your tower upward.
- An omen (1.2 seconds) appears before the eruption
- The eruption lasts ~0.7 seconds — very brief
- 9±1.5 seconds of rest (7.5–10.5 s) follows each blast
- The affected band is 120 px above and below the vent (240 px total)
- Frozen items within that band are unfrozen and flung — up to 2 at a time (this is the main cause of sudden tower collapses)
It looks frightening, but the burst is so brief that watching for the 1.2-second omen is enough. When the omen appears, stop dropping. Wait out the 0.7-second blast. Then use the rest phase to continue.
Which one should you prioritise?
When both arrive together, focus on the vortex. Geysers are over in under a second and usually just bounce items upward. The vortex persists for 6 seconds and dismantles your structure.
At the vortex peak, the correct play is to do nothing at all.
How to use your Shield — stardust is worth spending here
Neptune is the one stage where Shield use is clearly worth it. The two hazards respond differently:
- Great Dark Spot → Shield fully blocks it. Items inside a Shield are completely immune to the vortex's pull. Deploy the Shield during the growth phase (~1 s) and you will sail through the entire 6-second peak untouched
- Geyser → Shield protects against it. Items inside a Shield cannot be blasted loose or unfrozen by the geyser
If you spend stardust anywhere, spend it on a Shield timed to the Dark Spot's peak. Watch for the vortex to appear (growth phase), activate, endure the 6 seconds, then let the Shield lapse during the rest phase to save charges.
Q&A
Shield on the Dark Spot or the geyser?
Prioritise the Dark Spot. You can handle the geyser without a Shield by watching its 1.2-second omen and simply not dropping during the 0.7-second blast. The vortex is harder to dodge manually — that is where a Shield earns its cost.
Where does the vortex appear?
Within ±80 px of screen centre horizontally, roughly 30% down from the top edge. Pull radius: 220 px. Items closer to the vortex centre feel it more.
The geyser feels unpredictable — how do I read it?
Look for the omen visual: it shows 1.2 seconds before the blast. The moment you see it, stop tapping. After the 0.7-second eruption ends, you have 9 seconds on average (up to 12) to stack safely before the next one.
Common mistakes
Trying to fix things at the vortex peak
Watching your tower twist is agonising, but anything you add during those seconds simply gets spun as well. Endure. Wait for the rest phase.
Freezing up over the geysers
The opposite failure: being so wary of eruptions that you stop playing. The burst is under a second with a long gap after it. It looks scarier than it is.
Trying to react to both at once
The priority is fixed: vortex above, geyser below. When in doubt, watch the vortex and concentrate on holding on.
Stardust and combos
Neptune is the outer edge of the solar system. If you have made it here, spend freely — hoarding currency into a collapse is the worst ending.
The vortex works on items individually, so binding them together delays the breakup. Watch the cycle and use Gravity when it covers the peak. A Shield timed to the Dark Spot's peak is the most efficient use of stardust here — the full 6-second peak becomes free.
Save combos for the rest phase; ten quiet seconds is plenty for a decent chain.
And save your game. It has been a long journey — what lies beyond, you should see for yourself.
Some real science
Neptune has an unusual origin story: it was predicted by mathematics before anyone saw it.
Uranus's orbit did not quite match theory. Astronomers reasoned that another massive planet must lie further out, calculated where it should be, pointed a telescope there — and it was. That was 1846: the moment humanity found something invisible using equations alone.
Neptune also has some of the fastest winds in the solar system, reaching close to 2,000 km/h, despite receiving very little energy from the distant Sun. Exactly why remains unresolved.
The Great Dark Spot was a real vortex observed by Voyager 2 — but unlike Jupiter's Great Red Spot, later observations found it had vanished within a few years. It is a storm that appears and disappears.
The geysers are real too, observed on Neptune's moon Triton, where nitrogen erupts kilometres high in a world colder than minus 200 degrees. Even at the edge of the solar system, things are still moving.
Summary
- The vortex rotates your items and destroys structure. Do nothing at the peak
- Geysers last under a second — harmless if you watch the omen
- When both hit, prioritise enduring the vortex
- Learn the rest-phase rhythm and you will get through